Scrivener Graphics Tip
Sample of text substitution for a PDF Compile Format
Automate Graphic Selection
Aye, here's the rub! ePubs can be in color, of course, but print editions are typically printed in grayscale (aka b&w). All fine and dandy, but printing on a page requires much lighter images, especially if you're using cream-colored or other non-bright-white paper, but that same image would look unpleasantly washed out on a screen.
Thus, we will need to:
- make different images for ePub & print
- modify the Scrivener project to automatically choose images based on the project destination (print or screen)
But how?!
Exactly! That's what I wondered, too! Now, after rabbit-holing a little more than I would like to admit, I'm here to tell you that the easiest way to do it is with simple text substitution.
Here's a step-by-step:
Set up an image folder
Create a folder in your Binder at the root level and call it something like images.
Drag your various images into the images folder.
For this example, we'll have two versions of a recipe graphic:
- egg_recipe_color
- egg_recipe_grayscale
Set up your manuscript files
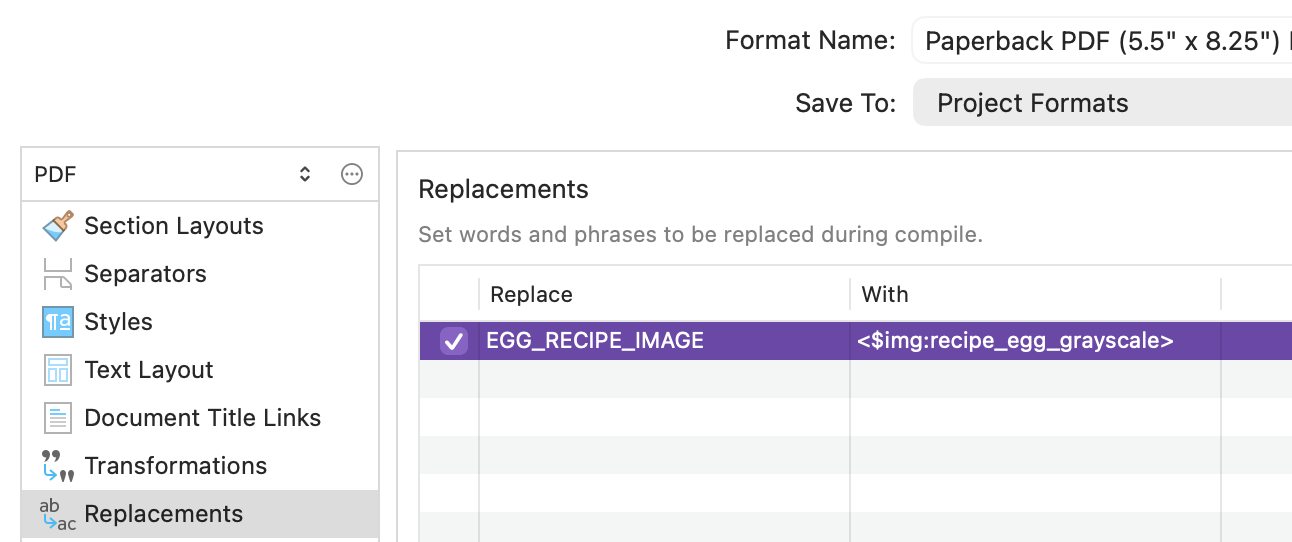
Wherever you need that image to show up in your manuscript, you will want to place a unique target string. In this example we will use: EGG_RECIPE_IMAGE.
Set up your Compile Formats
Now, we will set up search-and-replace for each document format you want to compile.
When you compile, it will look for your target string and replace it with an image placeholder tag.
So, for this example, we will use the following image placeholder tags:
<$img:egg_recipe_color;ebook=95%>for your ePub format (image scales to 95% of the ebook-reader device's width)<$img:egg_recipe_grayscale>for PDFs.
Go to File->Compile...
- For each format you compile to:
- Select a file format from the "Compile For:" dropdown, e.g.
ePub Ebook (.epub) - In left-nav's "Formats" list, right-click on a target format, select "Edit Format..." (or just double-click)
- Select "Replacements" from the format designer dialog
- For each custom image in the document, create a replacement item:
- Click the
+to add a new search-and-replace item - Plug your target string (e.g.
EGG_RECIPE_IMAGE) into the "Replace" field; in the "With" field, plug in your image placeholder
- Click the
- Click save to exit the dialog
- Select a file format from the "Compile For:" dropdown, e.g.
- Hold down Option and save your changes, or execute an actual compile, which will also save your changes.
Validate your work!
Compile your document for each compile type and check your results. Scrivener is as powerful as it is finicky, so make sure your hard work results in polished output!
Notes
- I did not need to include the file extensions for the graphics in my project (e.g. adding a ".jpg" to the
egg_recipe_coloritem,) but your mileage may vary. - You can store your images in an external folder and reference them with a relative path. This is handy if you back up your project externally and want to save space on each backup.